I’m slowly working my way towards a new project in Cities: Skylines with a bit of an alternate history vibe, and nothing really sets a mood in such a fiction as a whole world fresh for the building. This is something I’ve been considering almost offhandedly since I read Mr Miyagi’s map making guide and found out about this wonderful and archaic tool called Wilbur. After messing around with Wilbur for a bit I decided I really ought to try to build a whole world but wasn’t sure how to go about it. Wilbur’s site has a tutorial called There and Back Again (classic Tolkien reference), which uses a tool called Fractal Terrains. The idea is great and all but the software costs about $40 so I set that all on the backburner…
…then I saw this thread by twice banned Twitter user @Send_Lwyds:
Quick worldbuilding tip: Don’t start with the map for the love of God, start with just one person, one village, one culture. work it out organically from there don’t try to be a maniac and go map-first.
Right with that out of the way im gonna show you how to start with the map
— Lwyd boy Online (@Send_Lwyds) June 27, 2018
They propose using VP Planet Generator, specifically the Morgensen Planet Generator tool it provides. There isn’t a whole lot to do in this program so I just thought of a random seed (which I won’t share here since typically if I can just pound out a long string of digits on a num pad it’s because that’s my password for something) and ran with it. The resulting map (in color because it looks cooler) was this:
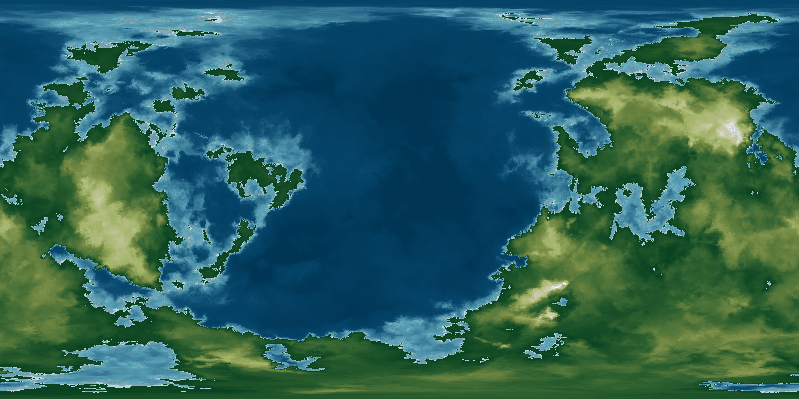
FIGURE 1. The base map generated using the Morgensen Planet Generator in VP Planet Generator.
I should probably mention that I’m calling this world “ma,” the toki pona word for “earth” or “world.” This whole project I’m planning is going to be in toki pona for the most part, especially the names.
Now, this is certainly something worth importing into Wilbur and fiddling about with all night. So I imported it into Wilbur then set the height scale with Filter>Mathematical>Span. Since the water level is 0 in Wilbur, and the heightmap is just 8-bit greyscale (0-255) I set the span to $[-127, 127]$. I could probably have done like $128$ as the maxima, but I am absolutely winging everything. I also scaled up the image to $1600\times800$ so I could work in more detail. After that I just applied a bunch of Filter>Erosion>Incise Flow and Filter>Erosion>Precipiton-Based filters with some Filter>Noise>Percentage Noise, Filter>Noise>Absolute Magnitude Noise, and Filter>Fill>Fill Basins thrown in to spice it all up. I really just threw value around until it looked decent but the noise was all typically in like a $[1,3]$ range, nothing too extreme.
Anyway, at that point it occurred to me that I have a blog and I can totally write what I’m doing down, so here’s the map right now:
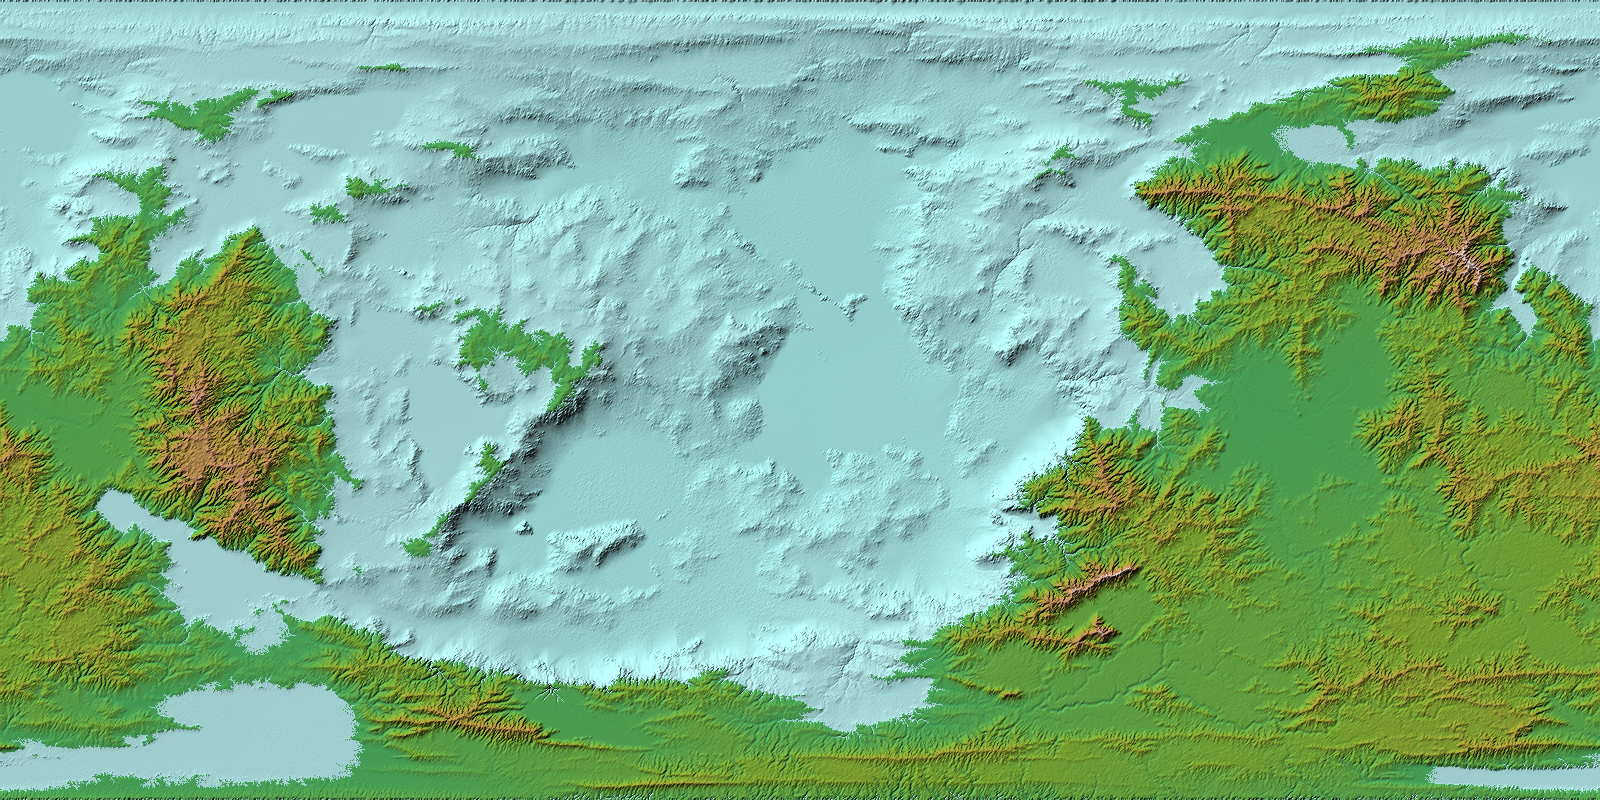
FIGURE 2. The map after applying erosion and noise in Wilbur.
Some notes on how I feel about this: it’s not great. I love the big archipelago part but other than that we have some supercontinent shit going on here. Not that there’s anything wrong with supercontinents I just don’t want the sort of dry world that this would create. There also aren’t a lot of cutesy islands for people to live on and species to diverge on or any big ocean trenches to break up the ocean floor. What I’m saying is I need to work on some plate tectonics. Artifexian did a video on worldbuilding like this, and somewhat more importantly also did a more longform tutorial on implementing this. While I originally intended to embed the tutorial, it’s now occurred to me that the only important part is that he points to a program called GPlates. The way he uses it is essentially to just sketch in the intended plate locations, but I’m a sucker for extremely convoluted simulation software so I’m going to actually dive into the tutorials for it briefly (also, sketching onto the globe is also more readily done in an online program called maptoglobe.com which I will also be using more late probably).
Ok, I’ve skimmed some stuff on it and concluded that I’m just going to wing this because GPlates doesn’t actually alter the heightmap. So I just opened up sketch mode in maptoglobe and drew out some tectonic plates based on what already exists on the map:
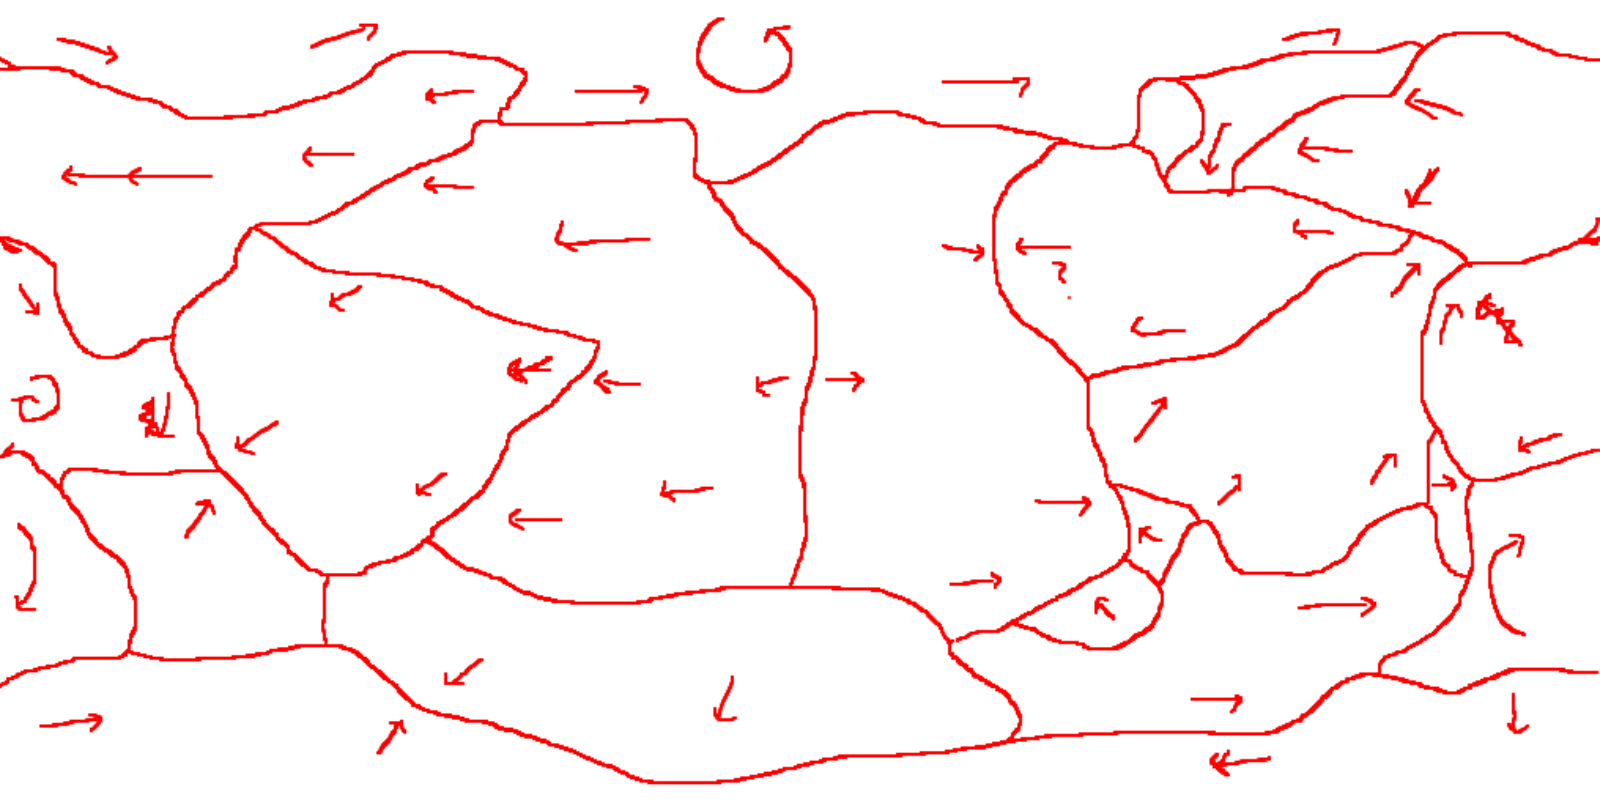
FIGURE 3. Tectonic plate arrangement based on existing geographic features.
Anyway this mainly just means that I need a mid-oceanic ridge, some trenches, and continental shelves. The ridge is a total pain bc there’s nothing at all to help so I manually flattened the ocean, painted in a line of raised terrain, smudged it out to get that outward growth look, added some noise, eroded, then garnished with a thin line of raised terrain along the ridge. Trenches were just some lowering of the ocean floor in front of some mountains, sort of lackluster compared to the real ones, but I wanted to focus on bigger things. One such thing is the continental shelves, I picked a depth ($-18$ or so) and brushed the area using the Maximum setting so it would only raise the floor and not lower the adjacent land, then raised the whole map, added noise, eroded, and lowered the terrain back down. Of course, I was filling in basins between most steps, I’m just opting to not say that repeatedly.
I’m not feeling particularly inspired here anymore, perhaps I should take a step back or edit it in some other software. Regardless, here’s what I’ve got now:
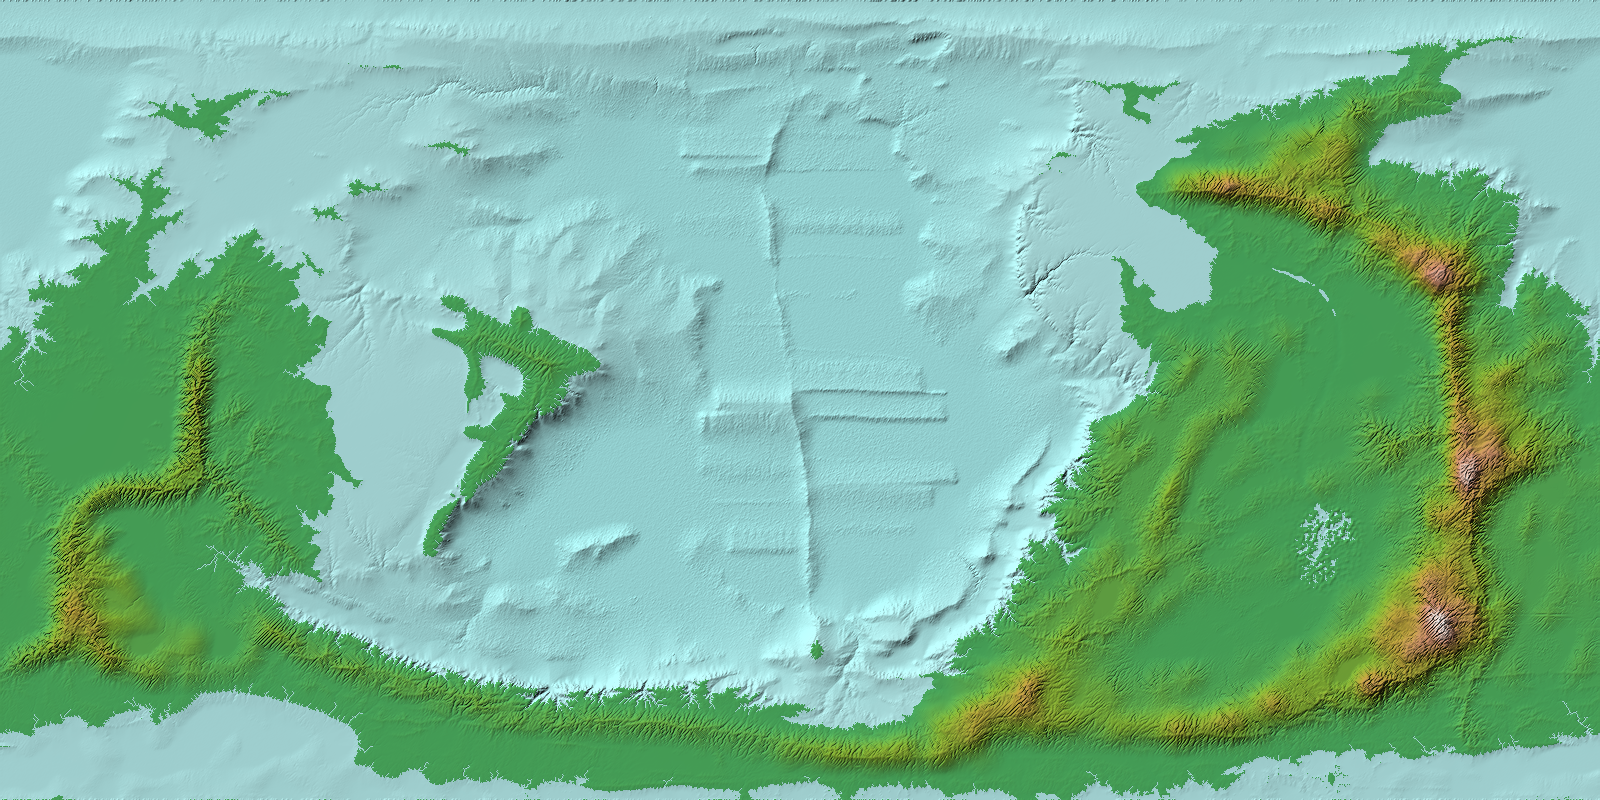
FIGURE 4. Map after altering geography to more accurately imply plate tectonics.
Like, it doesn’t look terrible per se, the mountains all just sort of seem to be thin lines in massively expansive plains.
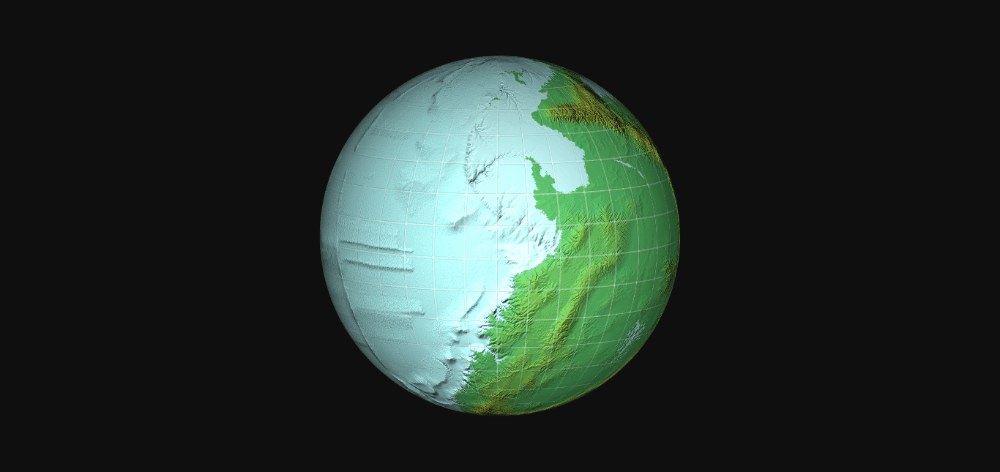
FIGURE 5. Animation of the totally mediocre map texture done using Map to Globe.
As a last ditch attempt to make this map bearable before going off and working on something else I opened up the last couple versions in Photoshop and set the older on as an overlay, clearing up the ocean part to just keep the new ridges and whatnot. I feel like this is a decent outcome from that:
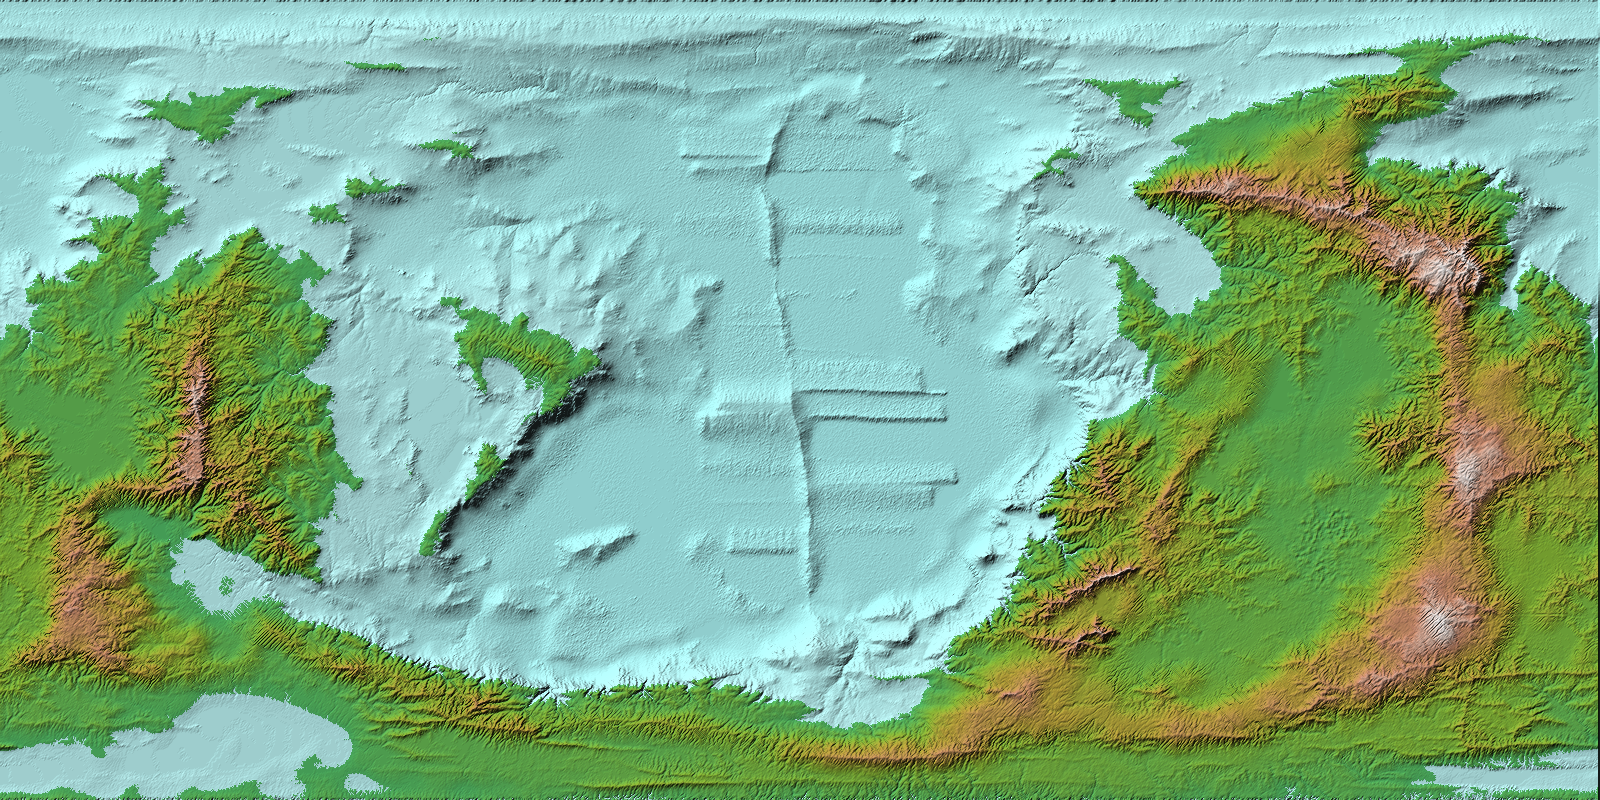
FIGURE 6. The map after just ramming the more accurate one that looks bad into the less accurate one that doesn’t look bad using Photoshop.
And I’ve been trying to force some decent rivers in there but at this scale I don’t really think it’s going to work. I’m fairly content with calling it here as far as the Wilbur parts go. I ran some more erosion on it but that’s pretty much it.
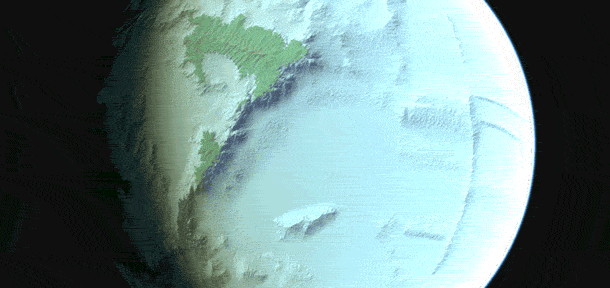
FIGURE 7. A highly compressed .gif showing the day/night cycle over what was once a really neat looking archipelago but is now just some islands that exist to make the map look like it has islands.
Now, continuing to not sleep, I can go on to determine other aspects of this world based off of the terrain. Most of the heavy lifting here is done by Space Calc’s [Climate Simulator][21]; by which I mean I’m mostly just dumping my heightmap in there, adjusting for the water level and calling it good. Here’s the climate map then:
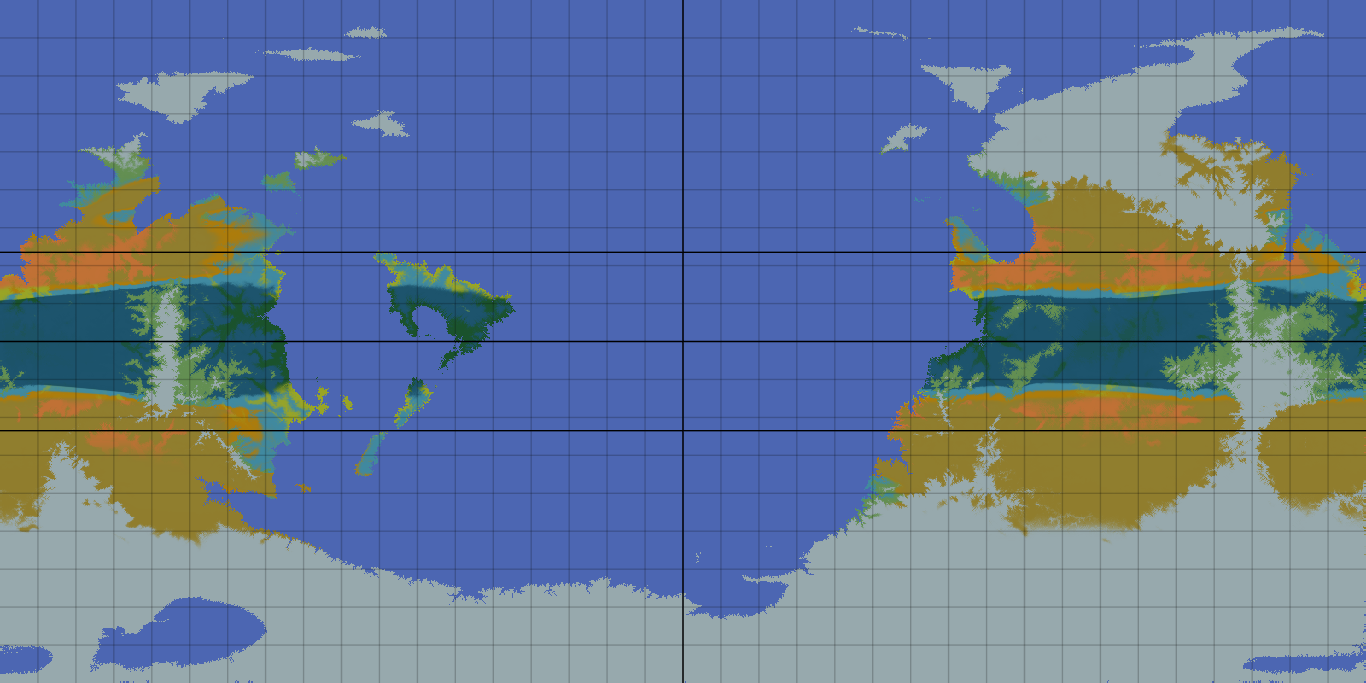
FIGURE 8. Map of estimated biome locations generated by Space Calc. Key: ice/tundra, taiga/boreal forest, temperate rainforest, shrubland, temperate grassland, savanna, and subtropical desert.
Now seems like a good time to crack open Photoshop again. My current plan is to, like, just apply generic textures of those biomes to the areas they would be and overlay the light map from Wilbur (Texture>Gray Maps>Light Map). What could go wrong?
To be continued… I guess.